If you work in IT you would have definitely come across this term called API. Regardless of your role, be it a product manager, Quality Analyst or a Data Analyst you must have definitely encountered or heard the term API being passed around among developers. For someone who has developed an application first hand or for beginners in the industry API might sound daunting and could even be a bit puzzling to understand. In this blog post I will decode everything you need to know to confidently understand what an API is and how it works. As the title of the blog suggests – this is a practical guide, which means that you will be introduced to tools which you can use to test out your APIs.
API (Application Programming Interface) in the most simplest of terms would mean a bridge between two systems. That’s all there is to it.
A bridge for all practical purpose is used to send people or cargo to and fro. In the same way an API is used to send data to and fro between systems. (APIs can do much more than simply sending data but hold your horses for now)
For the sake of argument let’s assume that there are two systems in place. System A and System B.
System A is your computer (can be replaced with your browser as well) and System B is a server.
If you are visiting a website, your browser will use APIs to GET data from a server.
Say you are registering on a website – you enter your email, password and location. This email, password and location gets POSTED to the server. You see what I am trying to get at ? Applications send data and receive data from a server. As you might already know, the server is where the information is stored. There are of course instances where you would want to modify the data that is saved in the server or delete it altogether but for starters this is it. An API is a system which allows applications to send & receive data – in short multiple applications can talk to each other via an API.
There are many types of APIs – like there are many types of bridges – but for the sake of brevity and relevance I will stick to REST API which is the most widely used API in the industry.
In-order to really understand APIs signup at postman.com. You can use the postman tool on your browser or download the desktop version of it. For context – Postman is the most popular API testing tool out there.
Now here’s the question – Which API should I be using ? We will be using public APIs for our example since we wouldn’t need to set up authorization for it.
We will be using Postman’s very own library API to send and receive data. I have chosen this API because it allows to not just GET data but also modify and delete it whenever required.
GET
In-order to retrieve data we need to make a GET request to the server. This request will ask the server to send data back to the client – in our case our local system.
To achieve this we need to send a GET request to an API end-point at the server side.
“API end-point” is a popular term you will encounter when dealing with dealing APIs.
Think of it as the address of the server – figuratively not technically.
The end-point we are gonna use is
https://library-api.postmanlabs.com/books
Now I want you to notice this end-point up close. It looks like any other URL with the Books path.
Try pasting this in your browser address bar and see what happens when press enter.
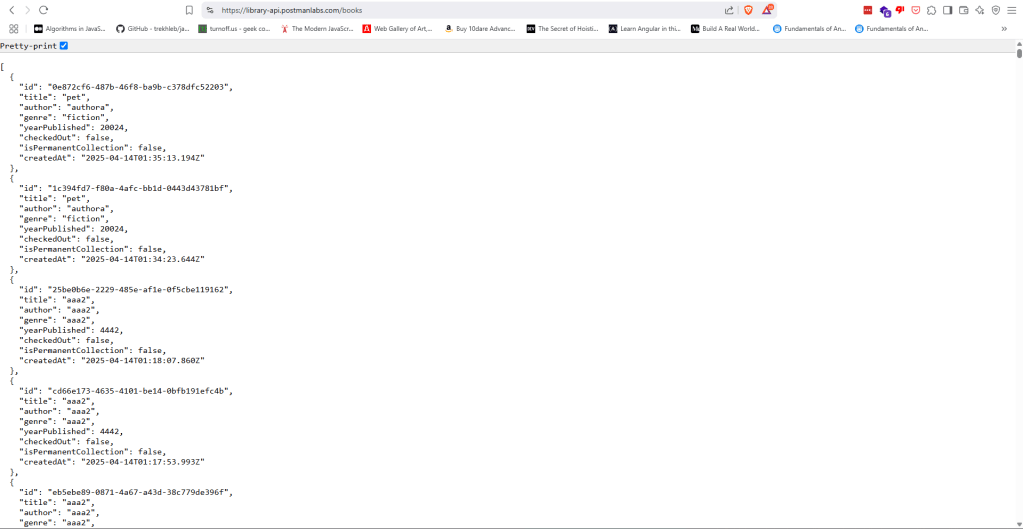
If you were able to see the screen below then you have successfully retrieved data from the server.
This is the address where the data resides and your browser has successfully retrieved the data for you.
We will do the exact same thing in Postman using the GET method.
Lets start off by making a collection in postman.
A collection is simply a space where you store relevant and related APIs. In our case, all the APIs relating to Books will be stored over here.
On the top left corner click the plus icon. You will see a collection on the left side panel named as New Collection.
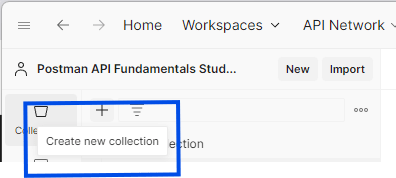
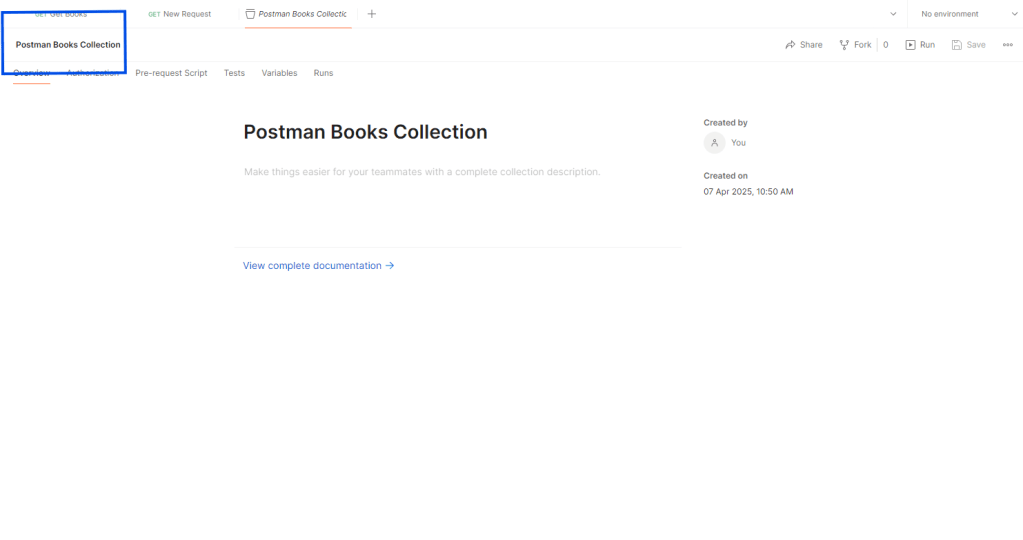
Clicking on New Collection will open a new tab. Here change the name New Collection to “Postman Book Collection”.
Now on the left side panel, when you hover over Postman Book Collection you will see three dots. Click it.
Here select New Request.

By default you will see that it was a GET request. You understand that because you see the word “GET” with the request name. When you click on New Request, you will see the following screen.
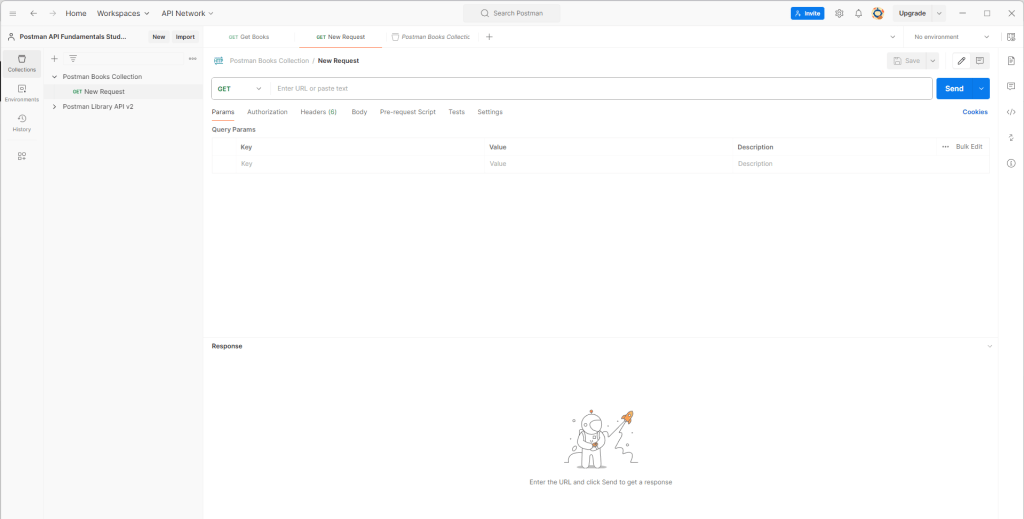
Change the name of this GET request from New Request to Get Books.
P.S. Naming APIs appropriately is very important because you will be working with a ton of APIs in the future and figuring out which is which is gonna be a tussle. Hence emphasize on naming APIs appropriately depending on the action that they do.
Now have a look at the screen infront of you. You will see an input field which says “Enter URL or paste text”. This is where you will paste the API end -point.
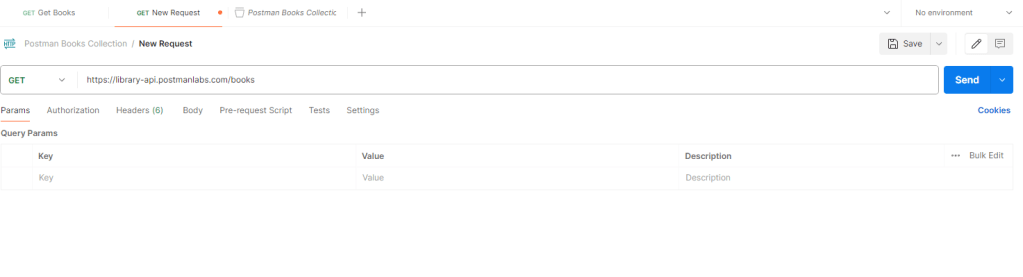
Once pasted, click send.
The GET method will retrieve the information from the server and display it to you on screen.

This is the exact data you saw when you searched it via your address bar.
What we have essentially done is used the GET method to retrieve data a.k.a. GET data from
https://library-api.postmanlabs.com/books
What if we need to send data back and add a new book to the server. We will discuss that in the next section.
Post
It is time to send data to the server. This is achieved using the POST method.
Even before that I want you to have a look at the response you had received using the last GET method.
 [
   {
        "id": "22792088-8326-47cc-903b-101a355c6158",
        "title": "To Kill a Mockingbird",
        "author": "Harper Lee",
        "genre": "fiction",
        "yearPublished": 1960,
        "checkedOut": false,
        "isPermanentCollection": false,
        "createdAt": "2025-04-15T02:08:47.683Z"
    },

....
]
The response that we have received is in the JSON format.
JSON format is simply a notation/format which is used to pass data. Here it starts & ends with square brackets and has curly braces inside it. Inside the curly braces we have data in the key value format.
For eg. id is the key and 22792088-8326-47cc-903b-101a355c6158 is the format.
When we pass data to the server, we will also be required to pass data in the key value pair format.
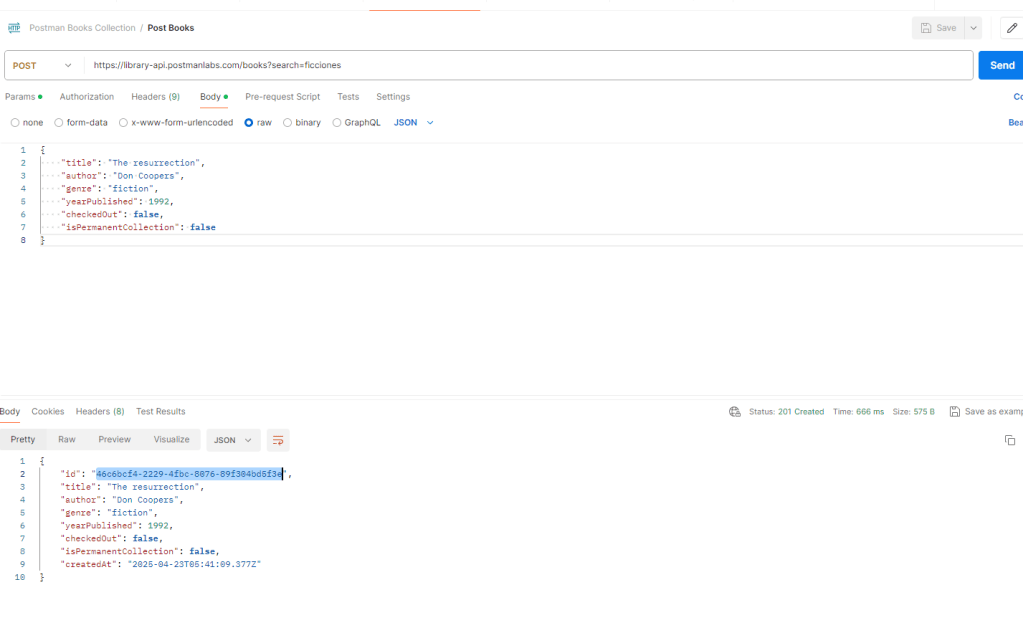
So lets prepare a JSON format styled data to send to the server. I suggest you create one of your own to fully understand this concept. You may take reference from the code below.
    {
        "title": "The resurrection",
        "author": "Don Cooper",
        "genre": "fiction",
        "yearPublished": 1992,
        "checkedOut": false,
        "isPermanentCollection": false,
    },
You may have noticed that I have removed the id and createdAt keys from the data above. This is intentional. Id & createdAt will be auto included as and when a new entry is added to the system. These are auto generated data.
Question : How would you know which key value pair is system generated and which is not ?
Answer : Refer your API document!
Click on the three dots next to “Postman Book Collection” and add a new request.
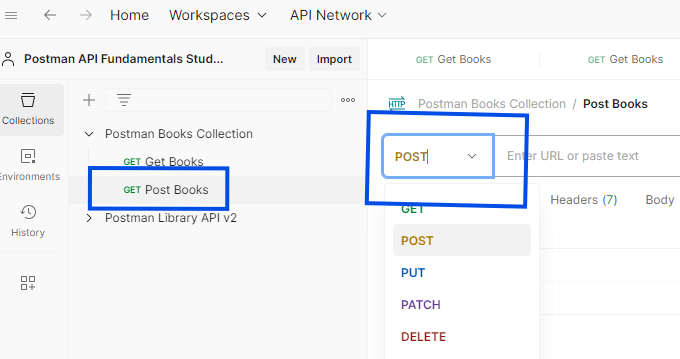
We can use the same API end point to add a book to the database.
https://library-api.postmanlabs.com/booksPaste this link in the field.
Now copy the JSON data you had prepared.
Click on Body > Raw
Now paste this data in the text area below.

Now Save the request and click send.
You will see an error message like the one below
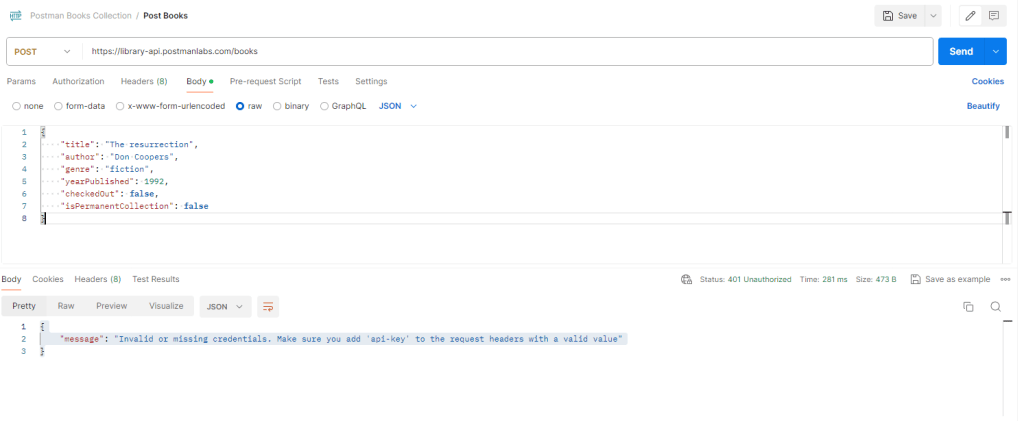
It is asking us to add an API Key.
API keys are nothing but authorization tokens that we use to access a database/server. Without the API key anyone would be able to access the server and send/receive data.
Since we are using Postman’s public server, they have provided a API key for us.
Go to header and change the add the following key and value pair

Now go back and try clicking the send button again.
You will see that the data is entered and the screen will look like below.

Note that the ID and createdAt date is already generated by the system.
This is how you send data to the server using the POST method.
Next Up we will see how we can retrieve just one book entry from the server and not the whole book list using the GET method.
Lets make a new GET request in collection. In this collection we can make a new collection called “Get Book by ID”. Using this collection we can retrieve a single book.
If you go back to your earlier book collection you will realize that the JSON looked like this.
The first attribute that you see over here is the ID. We will be working with IDs here.
Each ID is unique to a book.
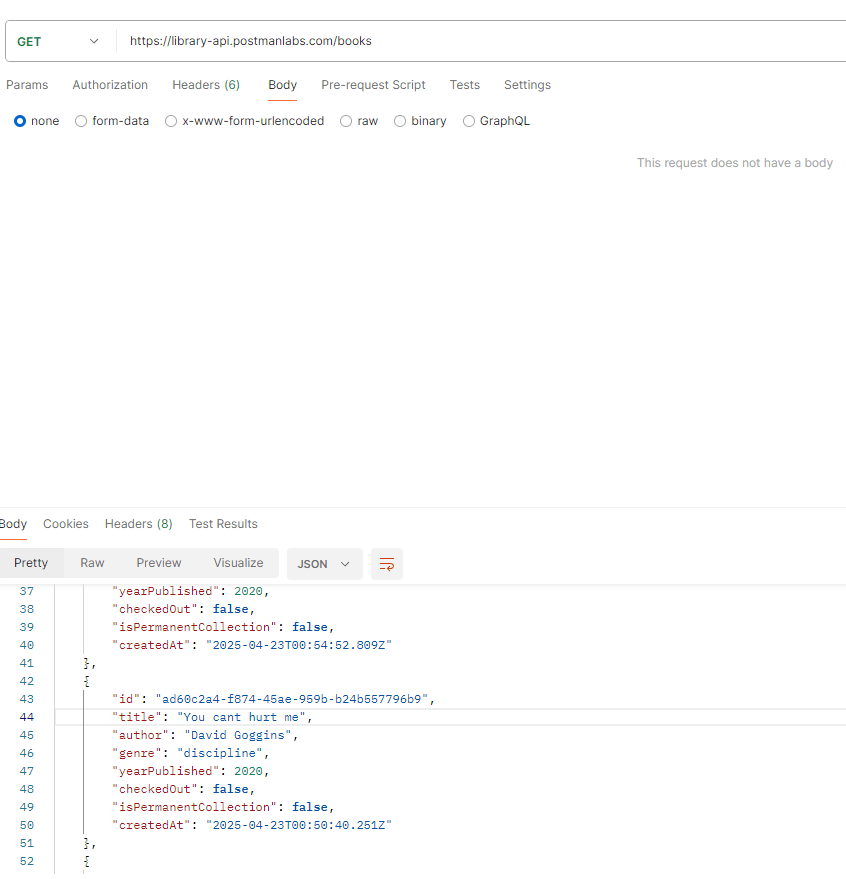
Now go back to the “Get Book by ID” collection and find an ID for any book of your choice.
If you see the image above for the book – “You Cant hurt me” the book ID is “ad60c2a4-f874-45ae-959b-b24b557796b9”.
Now lets try retrieving this book ID – in-order to retrieve this book ID we would have to do the following
Change the GET request to the following
https://library-api.postmanlabs.com/books/:id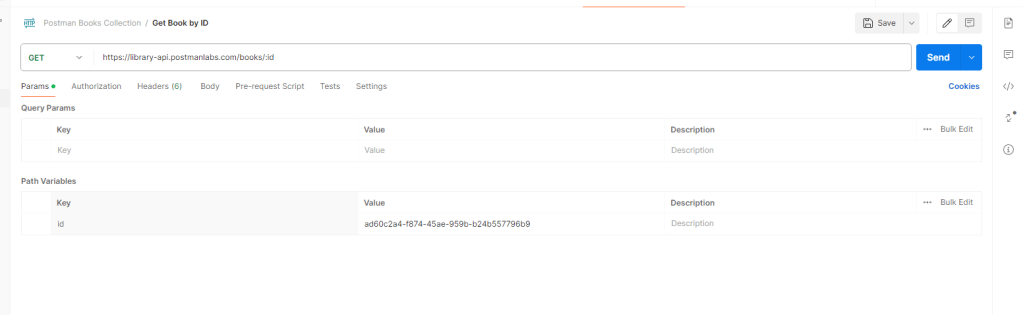
and in params add key as Id and Value as the ID of the book you had selected. In my case it is ad60c2a4-f874-45ae-959b-b24b557796b9.
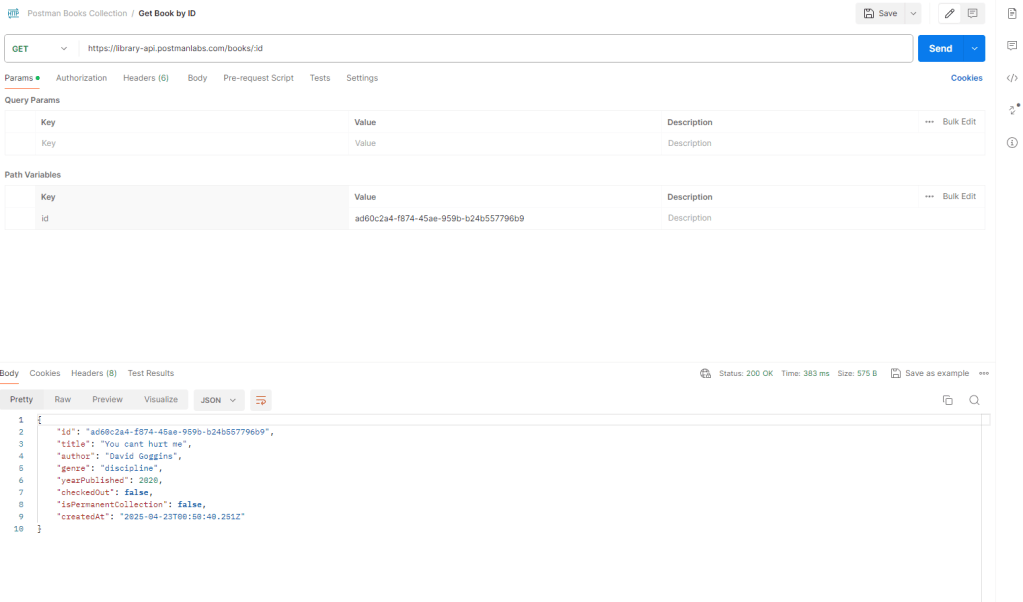
Once I click send the server returns the exact value JSON response back.
PATCH
The PATCH request helps us to modify or add to a json.
Lets take the ID Of the entry that we made in post.
For me that’s 46c6bcf4-2229-4fbc-8076-89f304bd5f3e
Now create a new request in our collection and name it “Checkout a book”.
Now change the REQUEST to PATCH and append the book id to the end after our API endpoint / books/
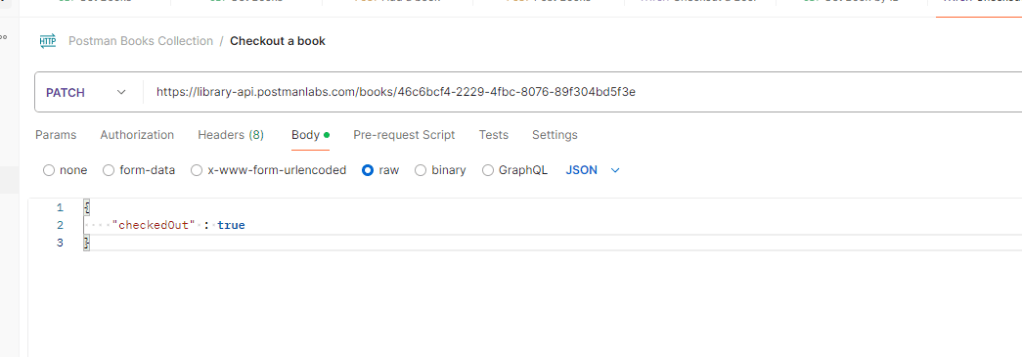
I have added a new parameter named as checkedOut which will add it to the JSON of the book.
Now when you save and click on send you will see the updated json.
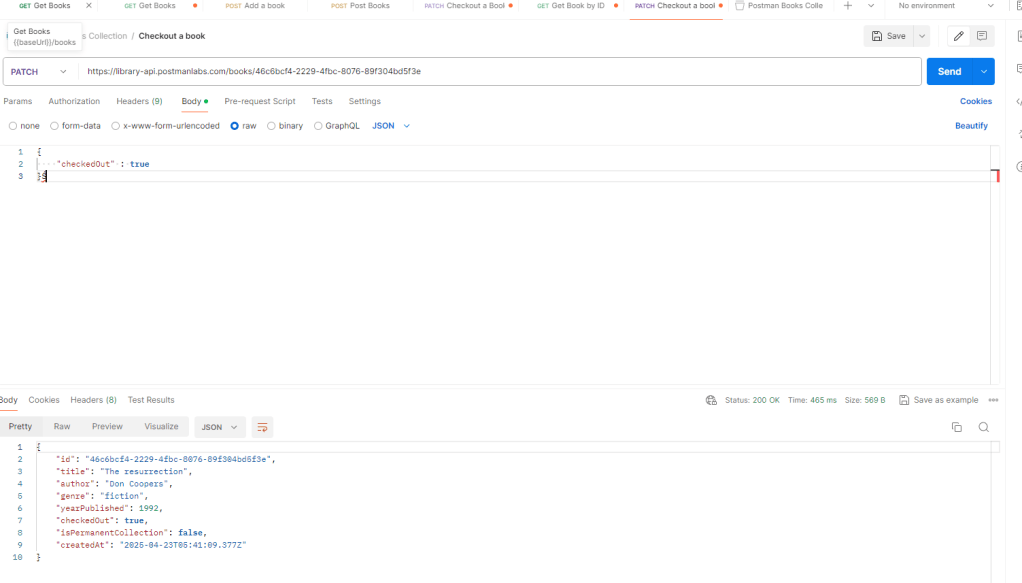
checkedOut has been added to your book.
DELETE
Deleting a book is pretty simple. All you have to do it create a new request in your collection. Change the method to DELETE and enter the API endpoint with the Book ID at the end – similar to what we did for PATCH.
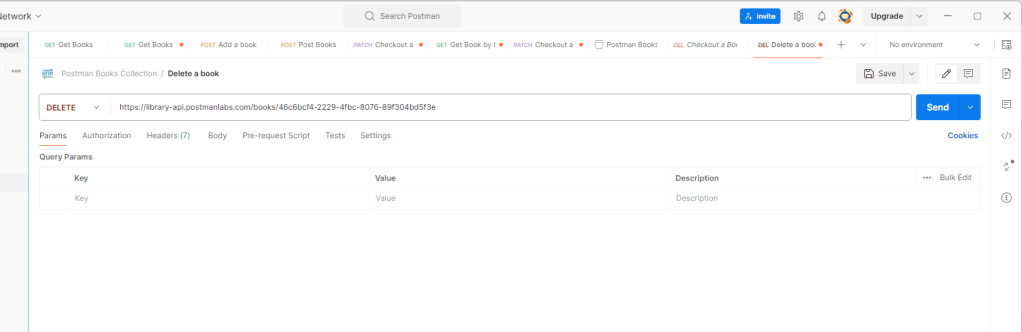
Save and click send.
Your book will be deleted.
Summary:
GET, POST, PATCH and DELETE are common API requests that are used in development.
GET retrieves data
POST sends data
PATCH modifies data
DELETE deletes data
API key are authorization tokens which you can use to access a database. Without the API key you cannot access a database. Certain public databases do not have an API key making them vulnerable.

Leave a reply to Geo Mukkath Cancel reply